-
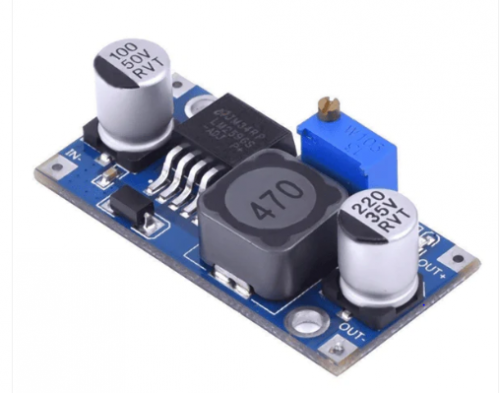
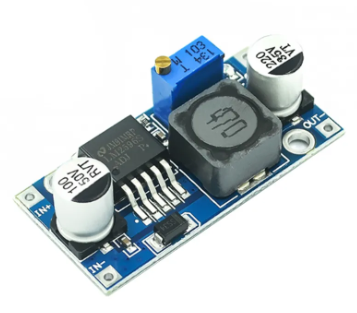
- Input: DC 3V to 40V (input voltage must be higher than the output voltage to 1.5v above can not boost)
- Output: DC 1.5V to 35V voltage continuously adjustable, high-efficiency maximum output current of 3A.
- Features: All solid capacitors, the 36u thickening circuit boards, high-Q inductance with output value of high-power LED indicator
- Dimensions: 45 (L) * 20 (W) * 14 (H) mm (with potentiometer)
-
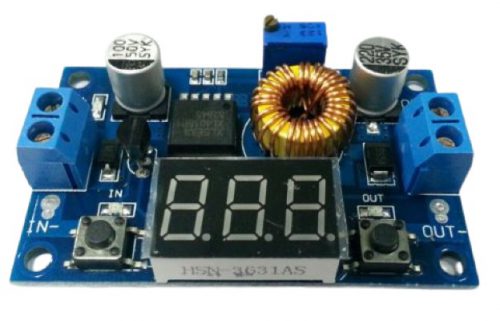 Module feature and performance: 5A high-power and high efficiency reduction voltage and low ripple High quality and good performance With power light and voltage display with self-correcting. Adopting advanced voltage microprocessor, and the voltmeter error ±0.1V, measuring range is 0~40V (Note: Please make sure input voltage more than 3.5V to make the voltmeter normal working) Touch the button to change input or output voltage, LED indicator light display is measuring voltage, and can autosave which one voltage, keep pressing the key can turn off the voltmeter Input voltage 4.0~38V (the input voltage must be higher 1.5V than output voltage) Adjustable output voltage range: 1.25V~36V (the input voltage must be higher 1.5V than output voltage) Output power can reach 75W. Output current can reach 5A, suggested use it less than 4.5A (note: Please add a cooling fin into power chip, if you use it with high-power)
 -
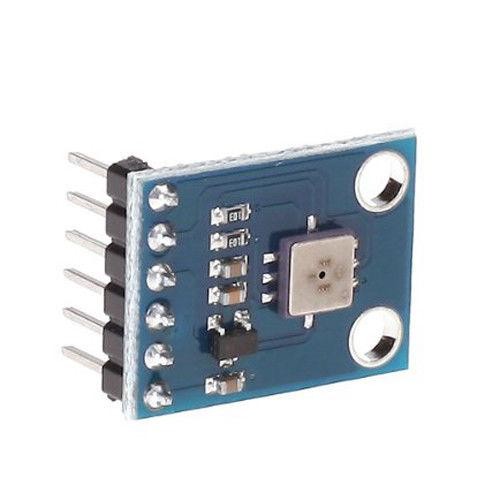
 1. 10 DOF Module (3 axis gyroscope 3 accelerometer 3 axis magnetic field air pressure) 2. Technology:Immersion Gold PCB 3. Chip: MPU6050 HMC5883L MS5611 4.Power Supply :3-5v 5.Communication: IIC communication protocol (fully compatible with the 3-5v System, circuit LLC is contained ) 6.Size: 2.2cm * 1.7cm
 -
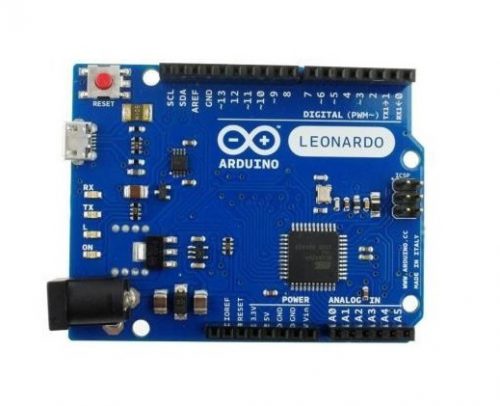 The Leonardo is Arduino’s first development board to use one microcontroller with built-in USB. Using the ATmega32U4 as its sole microcontroller allows it to be cheaper and simpler. Also, because the 32U4 is handling the USB directly, code libraries are available which allow the board to emulate a computer keyboard, mouse, and more using the USB-HID protocol! It has 20 digital input/output pins (of which 7 can be used as PWM outputs and 12 as analog inputs), a 16 MHz crystal oscillator, a micro USB connection, a power jack, an ICSP header, and a reset button. It contains everything needed to support the microcontroller; simply connect it to a computer with a USB cable or power it with a AC-to-DC adapter or battery to get started.
 -
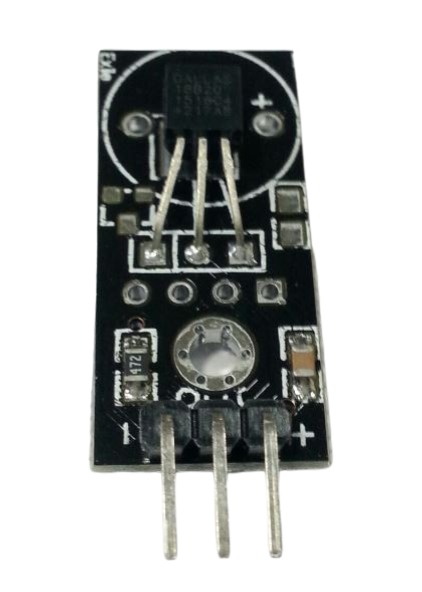 Introduction: These 3-wire digital temperature sensors are fairly precise (±0.5°C over much of the range) and can give up to 12 bits of precision from the onboard digital-to-analog converter. They work great with any microcontroller using a single digital pin, and you can even connect multiple ones to the same pin, each one has a unique 64-bit ID burned in at the factory to differentiate them. Usable with 3.0-5.0V systems. Technical Details: Technical specs: Usable temperature range: -5° to 90°C (-23°F to 194°F) 9 to 12 bit selectable resolution Uses 1-Wire interface- requires only one digital pin for communication Unique 64 bit ID burned into chip Multiple sensors can share one pin ±0.5°C Accuracy from -10°C to 85°C Temperature-limit alarm system Query time is less than 750ms Usable with 3.0V to 5.5V power/data
 -
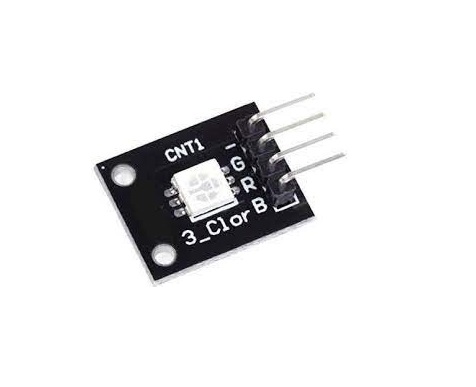
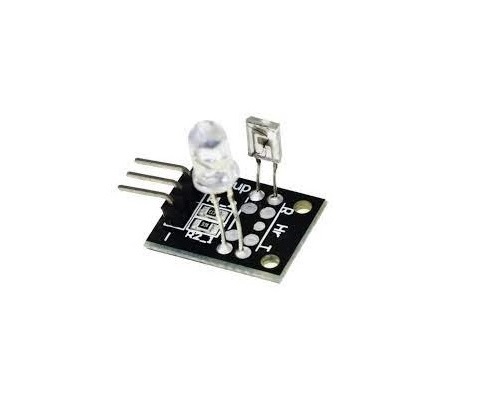 The Keyes-039 or KY039 Heart rate monitor consists of two things, an Infrared LED, and an Infrared Phototransistor. The IR LED should come on whenever the sensor has power and stay on (because it is infrared, you won’t be able to see that it is on, but if you look through your cell phone camera you will). The IR photo transistor causes the voltage to change on a “sensor” wire, and this should be connected to one of the Arduino’s analog pins.
 -
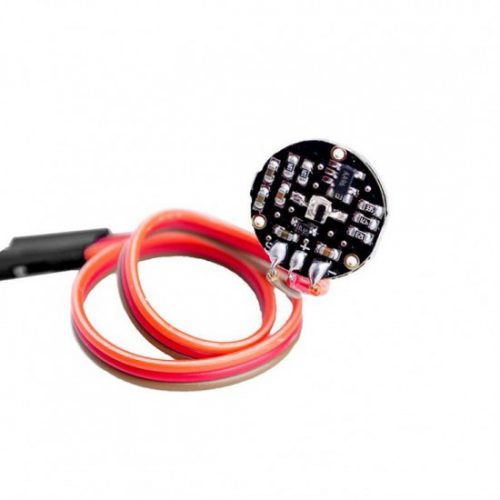 Pulse sensor is used to test heart rate sensors. Students, artists, athletes, creators, games or mobile terminal developers can develop heart-related and interactive works. Sensor can be worn on the finger or earlobe, It also has an open-source app program, you can put your real-time heart rate displayed by the graph. In essence, a heart rate sensor integrated optical amplifier and noise elimination circuit.
 -
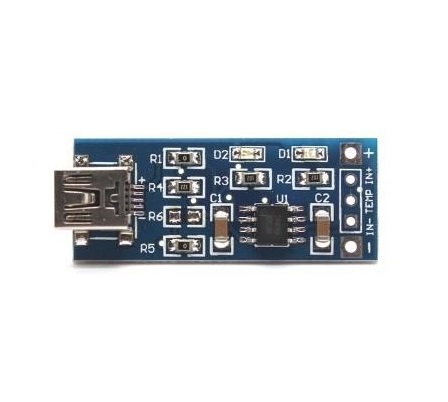 '- Board TP4056 lithium charge management chip - Mini USB head can link directly to the computer USB port charging - The charging board can also power supply from (IN and IN-) pin - Setting aside the the TEMP pin interface can be used as lithium battery temperature detection - Input voltage: 4V~8V - Maximum output charging current: 1000mA - D1 indicator lights on when in charging, D2 lights on when charging completed - English Manual/Spec: Yes - Great for DIY project
 -
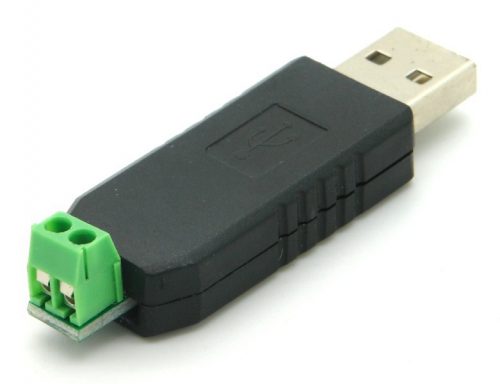 The USB to RS485 module is a cost-effective way to convert RS485 industrial buses to a USB interface. When connected to a PC USB port the USB to RS485 module is automatically detected and is installed as a native COM port which is compatible with any existing serial communication application. Multiple modules can be installed when using USB hubs thus allowing a hassle-free configuration of a multi serial system. Features
- Reliable RS485 link
- Automatic Switching between Transmit/Receive mode of RS485.
- Twisted pair cable can work upto 1.2 Km distance.
- Ground Output for wire shielding.
- USB Powered
- USB Port Plugabble type
- Designed for industrial environment
- Any baud rate from 1200 bps to 115 kbps
- Current: 100mA current at 5V DC taken from PC’s USB Port
- Modes: RS-485 Half Duplex (2-wire)
- Built in terminal resistor of 120R Ohm
- Length of twisted pair cable maximum can be 1.2 Km (Kilometer) Maximum
- Cable type for optimal range: Two core, Twisted Pair Shielded type, D and D- should be twisted with each other to get optimal range
-
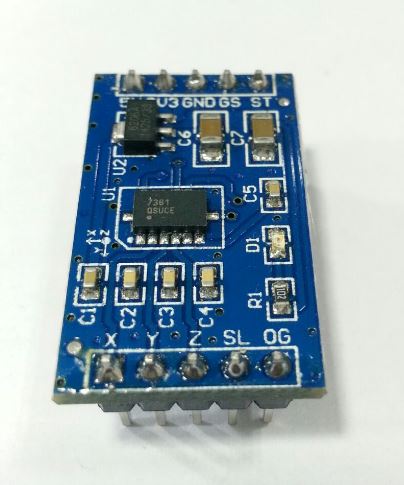 This is a breakout board for Freescale’s MMA7361L three-axis analog MEMS accelerometer. The sensor requires a very low amount of power and has a g-select input which switches the accelerometer between ±1.5g and ±6g measurement ranges. Other features include a sleep mode, signal conditioning, a 1-pole low pass filter, temperature compensation, self test, and 0g-detect which detects linear freefall. Zero-g offset and sensitivity are factory set and require no external devices.
 -
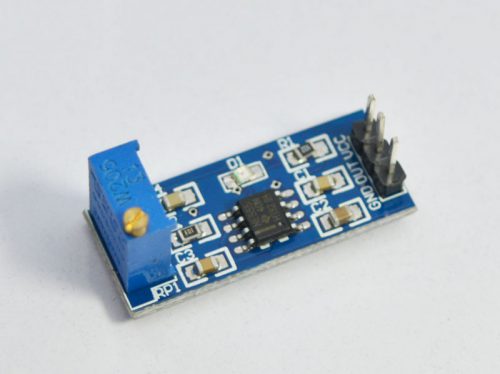 he 555 timer IC is an integrated circuit (chip) used in a variety of timer, pulse generation, and oscillator applications. The 555 can be used to provide time delays, as an oscillator, and as a flip-flop element. Derivatives provide up to four timing circuits in one package. Introduced in 1971 by Signetics, the 555 is still in widespread use due to its ease of use, low price, and stability. It is now made by many companies in the original bipolar and also in low-power CMOS types. This module is use as a square-wave signal generator. It generates square wave signals used for experimental development. It also generates square wave signal driving motor drive. With adjustable pulses generated for use by the MCU and adjustable pulse control related circuits.
 -
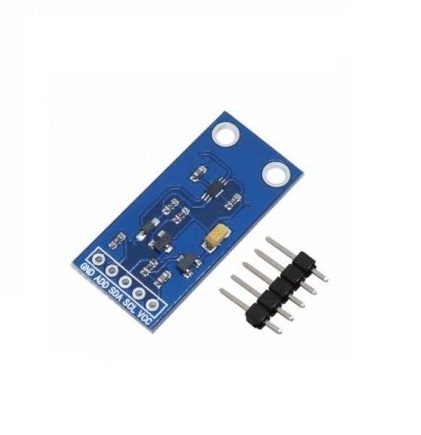
 Description: The GY8511 breakout is an easy to use ultraviolet light sensor. The MP8511 UV (ultraviolet) Sensor works by outputing an analog signal in relation to the amount of UV light that’s detected. This breakout can be very handy in creating devices that warn the user of sunburn or detect the UV index as it relates to weather conditions.This sensor detects 280-390nm light most effectively. This is categorized as part of the UVB (burning rays) spectrum and most of the UVA (tanning rays) spectrum. It outputs a analog voltage that is linearly related to the measured UV intensity (mW/cm2). If your microcontroller can do an analog to digital signal conversion then you can detect the level of UV!
 -
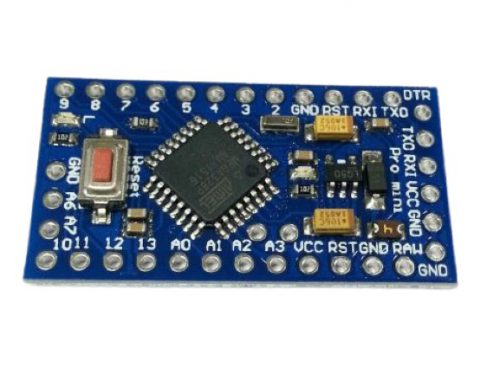 This is Arduino running the 16MHz bootloader. Arduino Pro Mini does not come with connectors populated so that you can solder in any connector or wire with any orientation you need. We recommend first time Arduino users start with the Uno R3. It’s a great board that will get you up and running quickly. The Arduino Pro series is meant for users that understand the limitations of system voltage , lack of connectors, and USB off board.

YOUR PARTNER IN TECHNOLOGY SOLUTIONS
YOUR PARTNER IN TECHNOLOGY SOLUTIONS
No.1030, Shriram Building,
Near Nagnath Par,
Sadashiv Peth, Pune – 411030,
Maharashtra, India
![]() Visit Our store
Visit Our store
STORE TIMINGS
Monday to Saturday
10:00 AM to 7.30 PM
(Store closed on all Sundays and Public Holidays)
NOTE
*All the prices are excluding Tax rates & are subject to change after a specific period of time.
Copyright © 2024@AbhinavDCS